UPGRADE / MIGRATE / CHANGE HDD TO SSD
11 March 2020
This tutorial will show you how to upgrade HDD to SSD without reinstalling windows and is applicable for almost all PC's and Laptops. We will show you how to use SSD and HDD at the same time (hybrid), but its also applicable if you just want to upgrade HDD to SSD. Don’t worry, IT’S REALLY EASY and the risk is low.
Can I Upgrade My HDD?
This tutorial is applicable for all PCs and Laptops that use Hard Disk Drive (HDD) with SATA cable. For your info, the majority of PCs and Laptops that released on 2009 until today uses SATA cables. Below is a picture of SATA connector. If your HDD using this kind of connector, then it means you can use this tutorial. It doesn’t matter if it’s SATA I, SATA II, or SATA III, as long as it’s a SATA.

But just for note, if your devices only support SATA I then you installed SSD that support SATA III, then the speed will only be at SATA I rate and vice versa.
SATA SPEED:
- SATA I: 1,5Gb/s
- SATA II: 3Gb/s
- SATA III: 6Gb/s
Just for info, below picture is an IDE cable for older PC. If your PC still use this kind of cable, then you cannot do this tutorial.
IDE Connector:

IDE Cable:

3 Steps to Upgrade / Migrate HDD to SSD:
- Clone or copy the operating system from HDD to SSD.
- Install the SSD on device.
- Lastly, just do minor setting (in BIOS) so the device will boot from SSD. Really easy.
SSD's Type:

The common one is 2.5 inch SSD. Its size is about the same as 2.5 inch HDD with a width of around 7cm.
There is mSATA SSD which is smaller than a 2.5 inch SSD. There is M.2 Form Factor SSD. A M.2 SATA NVMe SSD which is faster than basic M.2 SATA. And PCIe SSD which is usually for gaming devices.
Actually, there is also SSHD which combine SSD and HDD technology. The size of SSHD is about the same with 3.5 inch Hard Disc, but we will not talk about that here.
What SSD type should I buy?
Which one should we buy? It’s depended on your laptop or pc. Just check your device specification which type of SSD that is supported by your device. One thing for sure, if your HDD size is 2.5 inch or 3.5 inch and use a SATA cable, then you definitely can use a 2.5 inch SSD for upgrade.
If it’s not written in the specification, just open your laptop or PC cover than look for the SSD slot, is there any of it. If there isn’t, then just buy a 2.5 inch SSD.
And secondly, buy an SSD with enough capacity. We will talk about how big is enough later.
Step #1: Clone the Operating System.
CAUTION! Always unplug the electrical cord before opening PC or Laptop cover. Remove the laptop battery if it’s removeable.
Preparation for PC Desktop
For PC Users, connect the SSD to the motherboard using SATA cable. Usually there are more than one SATA port on motherboard. Plug it on the fastest SATA port, read it on your motherboard manual which one is the fastest. But usually all the ports have same speed.

Don’t forget to also plug the power cable to the SSD.

Preparation for Laptop
Laptop with a dedicated SSD slot:
For Laptop users, open the back cover then check if there is a dedicated SSD slot. If you can find it, then just plug the new SSD on that slot.
Laptop with no dedicated SSD slot and no CD-ROM
If your laptop doesn’t have a CD ROM and also there is no dedicated SSD slot, that means you cannot use SSD and HDD at the same time. If you want to upgrade from HDD to SSD, you need to buy a 2.5 inch external SSD or HDD case. Insert the new SSD to the external case then connect it to the laptop so we can copy the OS.

Laptop with a CD-ROM (Caddy method)
I use a 15 inch Lenovo Ideapad 310 laptop with a caddy method so it will hybrid using SSD and HDD at the same time. The function of a caddy is to put SSD or HDD in the CD ROM slot.

Note: If you use caddy, then you cannot use your CD-ROM again in your laptop because Caddy will use CD-ROM slot for using second HDD/SSD. However you can buy a Mini SATA cable so you can use your DVD/CD-ROM as external device using USB Cable.
There are two sizes of Caddy, which is 9.5mm and 12.7mm. To know which one to buy, you need to remove the CD ROM first. If your laptop is Lenovo, press the Fn button then S then V in sequence. This will disconnect the battery and the laptop will not turn on when the Power button is pressed. To turn it back on later, connect the charger. For other brand, read the manual how to disconnect battery or you can skip this part.
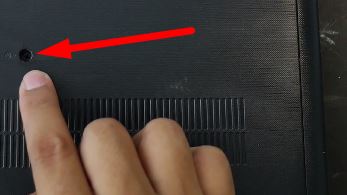
To remove the CD ROM, you just need to open one screw next to the CD-ROM slot.
After that, pull the CD ROM out.

Use a ruler to measure the thickness. If it’s below 1cm, buy a 9.5mm caddy. If above 1cm, buy the 12.7mm caddy.

Install the new SSD in caddy.
Then insert caddy to the CD ROM slot.
Initialize the new SSD
Turn on the PC / Laptop. The new SSD will not be detected in My Computer because it has not been formatted.
Press the Windows key + R to open the Run menu. Then type diskmgmt.msc to open Disk Management. We need to initialize the SSD disk first. If it appears like below, select GPT then OK.

If it doesn't appear, look at the bottom and locate the SSD Disk. You can see from its capacity or the unallocated. Right-click then select "Initialize Disk". If there is no "Initialize Disk" option, look for: "Convert to GPT Disk". Select GPT then ok. After that restart the device.
Clone the OS
To clone operating system, we can use Macrium reflect. It’s free. Choose Home use, Enter your email. Open Email to get the download link.
 "Clone this disk"
We open the Macrium Reflect app. Locate the disk where Windows is installed. You can identify it from the name, capacity or drive letter. After that, select "Clone this disk"

"Select a Disk to Clone to ..."
Click "Select a Disk to Clone to ..." Then select your SSD, it can be identified from the name and capacity.
Copy the operating system Drive (Usually C: Drive)
We need to copy an existing operating system drive, usually is Drive C:. If you use hybrid system, you don’t need to copy the other drive such as drive D: E: or others. To copy, just left click and hold then drag it.

Before you buy an SSD, make sure it has enough capacity to store at least the entire operating system file, the one with Windows Icon.
It is also recommended to copy the disk partition with no drive letter (but has Windows Icon) if there is any. This is usually the Laptop recovery file from manufacturer.
If there is a space left on the new SSD, it will become a new drive partition. If you don’t want to create a new partition, click "Cloned Partition Properties" then click "Maximum Size"> OK.

After that, click Next several times. Then click "Finish". We don’t have to check "save Backup". Click OK to start the cloning process. The process will take time, depending on HDD and SSD speed and the number of files.
Differentiate the old HDD and the new SSD
When finished, if we open My Computer, we will find two drives that have same contents. To make it easier for use to detect which is the HDD and which on the SSD, we open C: Drive then create a new folder called “This is an OLD HDD..” or something.

After that, turn off the PC / Laptop.
STEP #2: INSTALL THE SSD IN THE RIGHT PLACE
For PC:
If all your SATA ports have same speed, then you don't have to do nothing. If it's not same, install SSD on the fastest SATA port available.
For Laptop With no CD-ROM:
Remove the SSD from external case then install it on your HDD place before.
For Laptop With Caddy Method:
We should install the SSD on the fastest port. If you use caddy, then you shoould install SSD in the place where HDD installed before. This mean you should switch HDD position to caddy and SSD from caddy to the HDD slot.
How to remove HDD from laptop:
Open the HDD Cover (some laptops needs to open the whole back cover to remove HDD). Remove the HDD by pull up then pull out.

Remove the plastic holder. Some laptops use bolt so pay attention to it.

After that you just put the HDD on caddy and SSD on the laptop hard drive slot.
STEP #3: BOOT PRIORITY SETUP
Enter BIOS
The next step is BIOS setup. Different brand might have different way for entering BIOS, just google it. On my Lenovo ideapad, after I press the power button, I press the Fn + F2 button. For PC user, usually you need to pres Del or Delete key or F2 key.
Open Boot Menu
The BIOS display can also vary. We need to set it so that the first boot is from SSD. We go to the Boot section.

You can see that the first boot position is still a Toshiba HDD even though we already switch the HDD and SSD hardware position.
Set SSD as first boot priority
We need to put the SSD to be the first one. Just read the instructions, for example I need to press Fn + F6 to Move it up.

Save & Exit
Exit and save by pressing Fn + FF10. Select Yes. Laptops will restart and then enter Windows.
FINALIZATION
If you successfully boot from SSD it will feels much faster than before. To make sure, we open My Computer. Find where the operating system installed. You can search for the Windows Icon / Logo on the Drive.

For example, the OS is in Drive C: as you can see the Windows Logo. I'm sure the C: Drive is an SSD because I can notice it from the capacity. To make sure, we open C: Drive and we can’t find the "THIS IS AN OLD HDD..." folder that we created to differentiate earlier.
Now we look for other drive that has similar content with C: Drive. In this example, the E: Drive have exact contents with Drive C:. However there's one difference, in Drive E: we can find the "THIS IS AN OLD HDD.." folder that we created earlier, which mean the E: Drive is the HDD and we already succesfully migrate the OS to SSD in Drive C: (The Windows Logo is on Drive C:)

Just to make sure, press Windows + R to start rum menu. Type diskmgmt.msc to open Disk Management. You can see that C: drive is on Disk 0 which is SSD. While drive E: is on Disk 1 which is the HDD.

After that you can format the E: drive which contain the old OS if you want. Just make sure to not format the wrong drive.You can view the video about this tutorial below: